Monthly Archives

July 2026

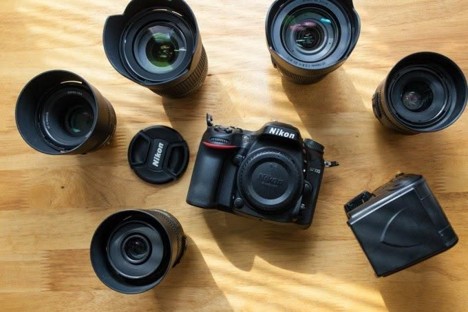
Kamerautrustning i all ära, men det riktiga hantverket handlar alltid om hur du betraktar världen runt omkring dig. Många fastnar tyvärr i tekniska inställningar och glömmer bort att själva kompositionen är bildens själ. En genomtänkt fotokurs hjälper dig att träna upp ditt personliga seende så att du hittar spännande vinklar i helt vanliga miljöer. Du lär dig att bygga upp bilder med djup, balans och stämning utan att det känns krångligt. Det gör fotograferandet betydligt roligare i vardagen. Snart ser du motiv där du tidigare bara gick förbi.

Se möjligheter i vardagliga miljöer

De allra bästa bilderna finns nästan alltid i din omedelbara närhet om du bara stannar upp ett ögonblick. Det handlar om att lägga märke till hur ljuset faller mot en tegelvägg eller hur skuggor bildar mönster på marken. Genom att sakta ner på promenaden upptäcker du former som skapar fantastisk dynamik i sökaren. Du behöver faktiskt inte resa till avlägsna platser för att hitta intressanta objekt. Det räcker gott med kvarteret där du bor. Att öva på detta bygger snabbt upp din visuella förmåga.

Arbeta aktivt med naturliga ramar

En effektiv metod för att skapa djup i bilden är att använda omgivningen som en naturlig inramning. Trädgrenar, fönsterkarmar eller gamla dörröppningar fungerar utmärkt för att rikta betraktarens blick mot motivet. Det ger en trevlig känsla av att man kikar in i en helt egen värld. Testa att flytta dig några decimeter åt sidan för att få med en intressant förgrund. Små justeringar gör ofta enorm skillnad för helhetsintrycket. Det är ett enkelt knep som direkt lyfter fram det viktiga i bilden.

Maximera sökarens funktioner i fält

När du fotograferar med en modern spegellös systemkamera ser du den slutgiltiga exponeringen direkt i sökaren innan du trycker på knappen. Det gör det extremt smidigt att laborera med ljus och skuggor i stunden. Du kan tryggt testa olika kompositioner och se hur färgtonerna ändras i realtid. Detta tar bort mycket av osäkerheten när du vill fånga ett snabbt ögonblick utomhus. Tekniken blir därmed ett stöd som hjälper dig att förverkliga dina idéer på ett väldigt smidigt sätt.

Hitta balansen med rätt linjer

Linjer i miljön är otroligt kraftfulla verktyg när du vill guida betraktaren genom hela bildytan. En slingrande skogsstig eller ett rakt staket skapar en naturlig väg in mot bildens huvudmotiv. Du kan också arbeta med diagonala linjer för att ge scenen mer energi och rörelse. Tänk på hur olika element samverkar så att bilden inte känner obalanserad eller rörig. Med lite metodisk träning hittar du dessa linjer helt automatiskt i omgivningen. Det ger dina fotografier en mycket starkare struktur.

Nöt in dina tekniska vanor

För att ditt kreativa seende ska få ta plats måste de tekniska momenten sitta i ryggmärgen. Om du ständigt måste leta efter rätt knapp på kameran tappar du lätt fokus på själva motivet. Öva regelbundet på att ändra bländare och slutartid utan att ta ögat från sökaren. Ju mer bekant du blir med reglagen, desto snabbare reagerar du när det perfekta ljuset dyker upp. Det skapar en fantastisk känsla av flyt när du är ute i fält och fotograferar.

Utvärdera bilderna med kritiskt öga

När du kommer hem bör du sätta dig i lugn och ro vid datorn för att granska dina alster. Titta inte bara på om skärpan sitter utan analysera främst hur kompositionen fungerar i sin helhet. Fundera på vad som gör att en bild känns helt rätt medan en annan inte når ända fram. Att lära sig av sina egna misstag är det snabbaste sättet att växa som bildskapare. Var stolt över dina framsteg och ta med dig erfarenheterna till nästa fototur.

Slutsats

Att utveckla sitt fotografiska seende är en otroligt givande process som förvandlar hur du betraktar din omgivning. När du väl bemästrar komposition, ljus och kamerans grundläggande funktioner får du full frihet i ditt skapande. Om du vill hitta fler strukturerade lektioner, praktiska övningar och användbara tips anpassade för dina behov kan du läsa vidare hos fotokurs-online.se för mer information. Fortsätt utmana dig själv i naturen, öva regelbundet i din egen takt och njut av varje litet framsteg du gör bakom sökaren.

0 comment
0 FacebookTwitterPinterestEmail

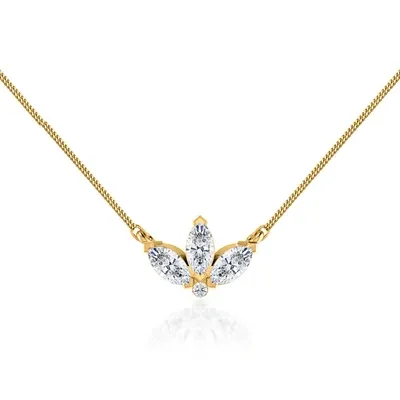
A necklace has a unique ability to frame the face, complement an outfit, and express personal style through a single piece of jewellery. Diamond-set necklaces add another layer of elegance by combining refined design with the natural brilliance of carefully placed stones. Whether you prefer a subtle pendant worn daily or a more distinctive design for special occasions, the right necklace should feel like a natural extension of your personality. Exploring different styles can help you understand what suits your preferences, and you can view diamond set jewellery at Lily Arkwright to discover diamond necklace designs created with timeless craftsmanship and elegant detailing.

Understanding Different Diamond Necklace Styles

Diamond-set necklaces come in a variety of designs, each creating a different visual effect. Diamond pendants are among the most versatile options, offering a refined focal point without overwhelming the overall look. A solitaire diamond pendant provides classic simplicity, allowing the stone to remain the centre of attention, while halo designs introduce additional sparkle by surrounding the centre stone with smaller diamonds.

For those who prefer a more expressive style, diamond necklaces featuring multiple stones or intricate arrangements can create a stronger statement. These designs often work beautifully for formal occasions, where jewellery becomes an important part of the overall appearance.

The choice of style should also reflect how often the necklace will be worn. A delicate pendant may become an everyday signature piece, while a more elaborate design can serve as a memorable addition to an occasion jewellery collection.

Choosing the Right Diamond Size, Shape, and Arrangement

The impact of a diamond necklace depends on more than the size of the stones. A larger diamond can create a bold and luxurious appearance, but a carefully designed necklace with smaller diamonds can achieve equal elegance through balance and proportion.

For example, someone choosing between a larger single diamond pendant and a design featuring multiple smaller diamonds may prefer the second option because the arrangement creates more overall sparkle and visual movement. The best choice depends on whether the desired effect is understated sophistication or a more noticeable statement.

Diamond shape also influences the character of a necklace. Round brilliant diamonds are popular for their classic sparkle and versatility. Oval, pear, and emerald cuts offer different silhouettes, creating a more distinctive look for those who want something less traditional. The arrangement of multiple diamonds can also change the style, from minimalist designs to more detailed compositions.

Selecting a Metal and Chain Style That Complements the Design

The metal plays an important role in how a diamond necklace appears when worn. Platinum provides a luxurious foundation with a naturally white finish that enhances the brilliance of diamonds while offering excellent durability.

Gold options provide additional styling possibilities. Yellow gold creates warmth and a classic appearance, white gold offers a sleek contemporary feel, and rose gold adds a softer tone with romantic appeal. The right choice often depends on existing jewellery and personal preference.

The chain itself also contributes to the overall design. A fine chain can create a delicate, barely-there appearance, allowing the diamond pendant to take centre stage. A stronger chain may better support larger designs while adding a more substantial look.

Matching a Diamond Necklace With Your Personal Style

A diamond necklace should complement the way you naturally dress and accessorise. Someone with a minimalist wardrobe may prefer a simple pendant that adds subtle elegance, while those who enjoy statement fashion may appreciate a design with greater presence.

Consider how the necklace works with other jewellery pieces. A well-chosen diamond necklace can pair beautifully with matching earrings or rings, creating a coordinated look without appearing excessive. The most successful jewellery choices feel intentional while still allowing personal expression.

Comfort and practicality also matter. A necklace worn regularly should feel lightweight, secure, and easy to style across different occasions.

Final Thought

Diamond-set necklaces offer a balance of elegance, versatility, and individuality. The ideal design is not simply the one with the largest stones but the one that reflects personal style, complements everyday life, and feels meaningful to wear. By considering the necklace style, diamond arrangement, metal, and overall design, you can choose a piece that remains a treasured part of your jewellery collection for years to come.

0 comment
0 FacebookTwitterPinterestEmail

Planning for these sessions is often a process that unfolds over several months. Instead of viewing a photography session as a single afternoon event, many families find that it is helpful to think of the project as a sequence of choices that develop from early preparation to the final delivery of the portraits. This progression allows for a more thoughtful result that reflects the individual personality of the student.

Getting started with early preparations and seasonal planning

The journey toward capturing the right images typically begins long before the camera is even brought out. Because the seasons in this region change so significantly, the timing of the session plays a meaningful role in the final aesthetic. Some students prefer the lush greenery and warmth of late summer, while others look toward the transformation of the landscape as the colors shift in the fall.

When beginning the process, it is useful to reflect on what the student wants the images to convey. Are they looking for a natural, outdoor setting that highlights their connection to the landscape, or is a more controlled, studio-style environment more aligned with their personal style? Discussing these preferences early on helps in selecting a professional who has the experience to bring that vision to life. A senior picture photographer in Madison who listens closely during this initial stage can provide guidance on lighting conditions, the timing of the day to avoid harsh shadows, and how different locations might complement the outfits the student has chosen.

Understanding how the session evolves and flows

As the day of the session arrives, the process typically shifts from planning into a more fluid, creative collaboration. A well-organized session usually allows time for transitions between different looks or locations, which adds variety to the final gallery of images.

During the actual photography, the focus often moves through several stages. A skilled practitioner typically starts with softer, more relaxed poses to help the student feel comfortable and authentic in front of the lens. As the session progresses, there is usually more room to experiment with different angles, movements, and expressions. This stage is less about adhering to a rigid script and more about observing how the student interacts with their surroundings. If a student has specific interests—such as sports equipment, musical instruments, or other personal items—these can be integrated in a way that feels organic rather than forced.

Identifying when the approach needs to be adjusted

Sometimes, the original plan for a session may need to be adapted based on changing conditions. Weather is a common variable for those working outdoors, and being flexible with dates or locations is part of the professional process. If the lighting is not cooperating or if the environment becomes too crowded, a thoughtful photographer will often suggest a pivot to a different area or a different time to ensure the quality of the portraits remains high.

Clear communication during the session is also important. If the student feels that a certain outfit or location is not accurately capturing their personality, it is beneficial for them to express that early on. A collaborative environment ensures that the time spent results in images that feel representative of who the student is at this stage of their life. Recognizing these moments for adjustment is what often separates a standard portrait session from one that results in meaningful, high-quality images.

Sustaining the quality and variety of the final results

The final stage of the project involves the careful review and selection of the portraits. After the session concludes, the professional typically sorts through the images to ensure that the lighting, focus, and composition meet a high standard. This phase often involves a transition from the creative work of the day to a more detailed technical review.

For many families, the goal is to have a diverse set of images that can be used for various purposes, from digital sharing to high-quality printed displays. A successful session should provide a balance of portraits—ranging from close-up headshots to wider angles that tell a broader story about the setting. When reviewing the work, families should look for consistency in the tone and quality of the edits. The best results often reflect a collaborative effort where the student’s identity is clear and the technical execution is precise.

Reflecting on the experience as a whole, the process of working with senior portrait photographers in Madison is a way to mark the transition toward the future. By moving through these stages—from the initial vision to the final selection of prints—the experience becomes more than just a task on a to-do list. It becomes a lasting documentation of an important period of growth, helping to preserve memories that are often appreciated more deeply as time passes. When families approach the experience with a focus on preparation, collaboration, and clear communication, the final portraits serve as a meaningful reflection of that unique chapter in the student’s life.

0 comment
0 FacebookTwitterPinterestEmail

Planning for these sessions is often a process that unfolds over several months. Instead of viewing a photography session as a single afternoon event, many families find that it is helpful to think of the project as a sequence of choices that develop from early preparation to the final delivery of the portraits. This progression allows for a more thoughtful result that reflects the individual personality of the student.

Getting started with early preparations and seasonal planning

The journey toward capturing the right images typically begins long before the camera is even brought out. Because the seasons in this region change so significantly, the timing of the session plays a meaningful role in the final aesthetic. Some students prefer the lush greenery and warmth of late summer, while others look toward the transformation of the landscape as the colors shift in the fall.

When beginning the process, it is useful to reflect on what the student wants the images to convey. Are they looking for a natural, outdoor setting that highlights their connection to the landscape, or is a more controlled, studio-style environment more aligned with their personal style? Discussing these preferences early on helps in selecting a professional who has the experience to bring that vision to life. A senior picture photographer in Madison who listens closely during this initial stage can provide guidance on lighting conditions, the timing of the day to avoid harsh shadows, and how different locations might complement the outfits the student has chosen.

Understanding how the session evolves and flows

As the day of the session arrives, the process typically shifts from planning into a more fluid, creative collaboration. A well-organized session usually allows time for transitions between different looks or locations, which adds variety to the final gallery of images.

During the actual photography, the focus often moves through several stages. A skilled practitioner typically starts with softer, more relaxed poses to help the student feel comfortable and authentic in front of the lens. As the session progresses, there is usually more room to experiment with different angles, movements, and expressions. This stage is less about adhering to a rigid script and more about observing how the student interacts with their surroundings. If a student has specific interests—such as sports equipment, musical instruments, or other personal items—these can be integrated in a way that feels organic rather than forced.

Identifying when the approach needs to be adjusted

Sometimes, the original plan for a session may need to be adapted based on changing conditions. Weather is a common variable for those working outdoors, and being flexible with dates or locations is part of the professional process. If the lighting is not cooperating or if the environment becomes too crowded, a thoughtful photographer will often suggest a pivot to a different area or a different time to ensure the quality of the portraits remains high.

Clear communication during the session is also important. If the student feels that a certain outfit or location is not accurately capturing their personality, it is beneficial for them to express that early on. A collaborative environment ensures that the time spent results in images that feel representative of who the student is at this stage of their life. Recognizing these moments for adjustment is what often separates a standard portrait session from one that results in meaningful, high-quality images.

Sustaining the quality and variety of the final results

The final stage of the project involves the careful review and selection of the portraits. After the session concludes, the professional typically sorts through the images to ensure that the lighting, focus, and composition meet a high standard. This phase often involves a transition from the creative work of the day to a more detailed technical review.

For many families, the goal is to have a diverse set of images that can be used for various purposes, from digital sharing to high-quality printed displays. A successful session should provide a balance of portraits—ranging from close-up headshots to wider angles that tell a broader story about the setting. When reviewing the work, families should look for consistency in the tone and quality of the edits. The best results often reflect a collaborative effort where the student’s identity is clear and the technical execution is precise.

Reflecting on the experience as a whole, the process of working with senior portrait photographers in Madison is a way to mark the transition toward the future. By moving through these stages—from the initial vision to the final selection of prints—the experience becomes more than just a task on a to-do list. It becomes a lasting documentation of an important period of growth, helping to preserve memories that are often appreciated more deeply as time passes. When families approach the experience with a focus on preparation, collaboration, and clear communication, the final portraits serve as a meaningful reflection of that unique chapter in the student’s life.

0 comment
0 FacebookTwitterPinterestEmail

Många fotografer drar sig för att använda en extern kamerablixt eftersom det artificiella ljuset till en början kan kännas svårbemästrat och onaturligt. Kamerans inbyggda, lilla blixt producerar ofta platta bilder med hårda skuggor, men med en monterad speedlight förändras spelplanen helt. En extern blixt ger dig kraften att själv kontrollera, rikta och forma ljuset, oavsett hur mörk omgivningen råkar vara. Att lära sig grunderna i blixtljus handlar inte om att överrösa motivet med ljus, utan om att förstå hur du skapar en harmonisk balans mellan det befintliga miljöljuset och den artificiella ljusblixten.

Slå blixten i taket för mjukt ljus

Det absolut enklaste sättet att få ett professionellt och mjukt resultat med din externa blixt är att utnyttja det rörliga blixthuvudet och studsa ljuset. Genom att rikta blixten snett uppåt mot ett vitt innertak eller en ljus vägg sprids ljusstrålarna ut över en mycket större yta innan de träffar ditt motiv. Denna smarta teknik är otroligt användbar under fotoresor inomhus, till exempel när du vill dokumentera lokala miljöer eller middagar i svagt upplysta lokaler. Det studsade ljuset skapar mjuka, naturliga skuggor som påminner om det behagliga ljusinsläppet från ett stort fönster.

Förstå skillnaden mellan TTL och manuellt läge

När du monterar din blixt på kameran har du i huvudsak två olika exponeringslägen att välja mellan: det automatiska TTL-läget eller det fullt manuella läget. TTL står för “Through the Lens” och innebär att kameran och blixten blixtsnabbt mäter avståndet och beräknar den perfekta ljusmängden helt automatiskt innan bilden tas. Om du deltar i en fotokurs systemkamera får du ofta lära dig att TTL är perfekt för snabba situationer där avståndet till motivet ständigt ändras. Det manuella läget passar däremot bäst i en kontrollerad miljö där du vill ha exakt samma ljusstyrka på varje bild.

Använd blixten som upplättningsljus i solsken

Det kan verka motsägelsefullt, men en extern blixt är faktiskt ett av de mest effektiva verktygen du kan använda utomhus mitt under en klar och solig dag. Det starka solskenet skapar ofta djupa, mörka och osmickrande skuggor under ögonen och näsan på en person som du vill porträttera. När du befinner dig på spännande fotoresor kan du använda blixten med reducerad styrka för att försiktigt “fylla i” och lätta upp dessa mörka skuggpartier. Denna teknik kallas för upplättningsblixt och ger dina utomhusporträtt ett omedelbart lyft utan att den naturliga solnedgångskänslan går förlorad.

Bemästra synkroniseringstider och High Speed Sync

En viktig teknisk aspekt att hålla koll på är kamerans maximala blixtsynktid, som i regel ligger runt en tvåhundradels sekund på de flesta moderna systemkameror. Om du försöker använda en snabbare slutartid i starkt dagsljus kommer delar av bilden att bli helt svarta eftersom slutarridåerna blockerar blixtljuset. Lösningen på detta problem stavas High Speed Sync (HSS), en funktion som gör att blixten skickar ut en serie extremt snabba ljuspulser i stället för en enda stor urladdning. Med HSS aktiverat kan du fotografera med korta slutartider och stora bländaröppningar även i fullt solsken.

Ta steget till att fotografera med blixten off-camera

För att ta ditt blixtfotograferande till en helt ny och konstnärlig nivå bör du så småningom plocka bort blixten från kamerahuset och placera den på ett separat stativ. Genom att använda en trådlös radiosändare kan du utlösa blixten från sidan eller snett bakifrån, vilket skapar ett fantastiskt djup och en tredimensionell känsla i bilden. På en avancerad fotokurs får man ofta lära sig hur ljusets vinkel helt förändrar motivets karaktär. Att flytta blixten bort från den optiska axeln är det snabbaste sättet att gå från amatörmässiga blixtbilder till dramatiska, studiokvalitativa resultat i fält.

Slutsats

Att integrera en extern kamerablixt i din fotografiska vardag öppnar upp en helt ny värld av kreativa möjligheter där du inte längre är begränsad av dygnets naturliga ljustimmar. Besök Masterfoto.se för att upptäcka fler handfasta guider, djupgående recensioner av ljusformare och praktiska tips som gör dig till en mer självsäker ljussättare. Genom att bemästra balansen mellan blixtljus och miljöljus kan du rädda fotosessioner som annars hade förstörts av dåliga väderförhållanden. Med rätt kunskap om hur ljusets riktning och kvalitet påverkar motivet förvandlas den externa blixten snabbt från ett orosmoment till ditt absolut mest pålitliga verktyg.

0 comment
0 FacebookTwitterPinterestEmail

Objektivet är en av de viktigaste delarna i fotografering, men också något många nybörjare underskattar. Kamerahuset fångar bilden, men det är objektivet som bestämmer hur ljus, skärpa och perspektiv återges. Två olika objektiv kan ge helt olika resultat även om de används på samma kamera. En Fotokurs nybörjare hjälper dig att förstå hur objektiv fungerar så att du kan göra smartare val från början och få bättre kontroll över dina bilder.

Brännvidd och hur bilden upplevs

Brännvidd avgör hur mycket av motivet som fångas och hur perspektivet ser ut. Ett kort objektiv (vidvinkel) fångar mycket av scenen och passar bra för landskap och miljöbilder, medan ett långt objektiv (tele) zoomar in och komprimerar avståndet. Skillnaden i brännvidd påverkar inte bara utsnittet utan också känslan i bilden. Vidvinkel kan ge en känsla av rymd, medan tele ger mer fokus på motivet och isolerar det från bakgrunden. Brännvidd är grunden för hur du formar din bild.

Bländare och ljusinsläpp i objektivet

Objektivets bländare styr hur mycket ljus som släpps in och påverkar samtidigt skärpedjupet. Ett objektiv med stor bländare (till exempel f/1.8) släpper in mer ljus och ger en suddig bakgrund. Detta är särskilt användbart för porträtt där du vill separera motivet från bakgrunden. Mindre bländare ger däremot större skärpedjup och används ofta i landskapsfotografering. Bländaren är ett kreativt verktyg som formar bildens uttryck.

Skillnaden mellan fasta och zoomobjektiv

Det finns två huvudtyper av objektiv: fasta och zoom. Fasta objektiv har en bestämd brännvidd och ger ofta bättre bildkvalitet och ljusstyrka. Zoomobjektiv är mer flexibla eftersom du kan ändra brännvidden utan att byta objektiv. Det gör dem praktiska för nybörjare som vill testa olika typer av fotografering. Valet handlar ofta om balans mellan flexibilitet och bildkvalitet.

Hur objektiv påverkar skärpa och kvalitet

Olika objektiv har olika optisk kvalitet, vilket påverkar skärpa, kontrast och färgåtergivning. Dyrare objektiv ger ofta bättre skärpa och prestanda i svagt ljus. Men även enklare objektiv kan ge mycket bra resultat om de används rätt. Ljuset och fotografens teknik spelar fortfarande en stor roll i slutresultatet. Objektivets kvalitet påverkar bilden, men det är inte allt.

Hur en Fotokurs nybörjare hjälper dig förstå objektiv

En Fotokurs nybörjare gör det enklare att förstå hur olika objektiv påverkar dina bilder. Du lär dig hur brännvidd, bländare och perspektiv samverkar i praktiken. Det gör att du kan välja rätt objektiv för rätt situation istället för att gissa. Med rätt kunskap blir det också enklare att utveckla din egen fotografiska stil. Kunskap gör objektivval mer logiskt och mindre förvirrande.

Vanliga misstag vid val av objektiv

Många nybörjare köper dyra eller avancerade objektiv direkt utan att förstå vad de faktiskt behöver. Det kan leda till att utrustningen inte används fullt ut. Ett annat vanligt misstag är att bara fokusera på zoom istället för bildkvalitet och ljusstyrka. I många fall räcker ett enkelt objektiv långt i början. Det viktigaste är att lära sig innan man uppgraderar.

När du ska byta eller köpa nytt objektiv

Du bör först byta eller köpa nytt objektiv när du märker att ditt nuvarande begränsar din fotografering. Det kan vara i svagt ljus, vid porträtt eller när du vill ha annan bildvinkel. När du har erfarenhet blir det lättare att förstå vilket objektiv som faktiskt förbättrar dina bilder. Då blir varje köp mer genomtänkt och användbart. Rätt timing för uppgradering ger bättre resultat.

Slutsats

Objektiv har stor påverkan på hur dina bilder ser ut, både när det gäller ljus, skärpa och perspektiv. Genom att förstå brännvidd, bländare och olika objektivtyper kan du ta mer medvetna val och förbättra dina resultat direkt. En Fotokurs nybörjare hjälper dig att bygga denna förståelse steg för steg, medan en Fotokurs ger dig bredare kunskap om hur du använder utrustningen kreativt. Om du vill fortsätta utveckla din fotografering kan du besöka fotokurs-online.se och ta nästa steg i din resa som fotograf.

0 comment
0 FacebookTwitterPinterestEmail